6. Testing in Mojito
Introduction
Our application has gotten complicated enough that we need to write some tests. We’re going to show you how to write unit and functional tests in this module, and we’re also going to add a few more mojits to fill out our dashboard. We already saw the Mojito CLI has a test command for running unit tests. To run functional tests, we’re going to use Arrow, which is an npm module that we’ll need to install. In future modules, we will be updating the mojit and functional tests that we wrote in this module. We expect you to write tests for the other mojits on your own.
Time Estimate
25 minutes
What We’ll Cover
- unit tests
- model tests
- controller tests
- functional tests with Arrow
Final Product
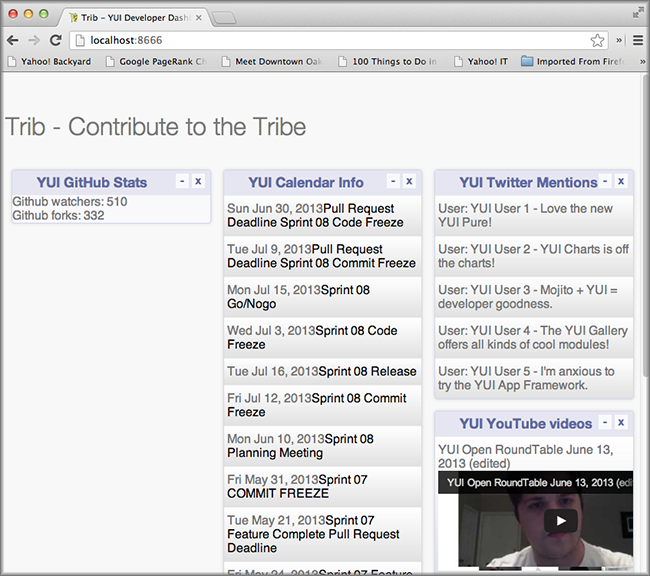
The main focus of this module is testing in Mojito, but as you can see from the screenshot, we’ve added some more mojits to flesh out the dashboard.
Before Starting
Review of the Last Module
We focused on getting data in the last module using YQL and the Mojito REST library. In Mojito applications, you want to use YQL whenever you can, and YUI makes it easier by having a YQL module. In certain cases, you may need to use the REST module because there is no YQL table available or because certain Web Services like Twitter set limitations on YQL making requests to the Twitter API.
We covered the following in the last module:
- mojit model
- YQL intro
- YQL statements
- YQL module
- REST module
- calling the model from the controller
Setting Up
$ cp -r 05_getting_data 06_testing
Add the dependencies yahoo-arrow and phantomjs to package.json, so that you can run functional tests. Arrow is the testing framework we’ll be using for functional tests, and it relies on PhantomJS to simulate the browser environment.
"optionalDependencies": {
  "simple-twitter": "~1.0.0",
   "yahoo-arrow": "~0.0.77",
   "phantomjs": ">=1.8.0"
},
From the 06_testing directory, install the dependencies:
$ npm install
Lesson: Testing
Introduction
Mojito uses YUITest for unit tests and relies on Arrow for functional tests. We’re going to cover unit tests in more detail, but also show you how to write a simple functional test with Arrow.
Unit Tests
Location
For application tests, the tests should be in the following directory: {app_name}/tests
For mojit tests, place the tests in the following directory: {app_name}/mojits/{mojit_name}/tests
Model tests are placed in the /tests/models directory for both application and mojit tests. You can also have tests for YUI modules, but we won’t be writing tests for YUI modules in this module.
File Name Convention
For controller tests, the test file name has the following syntax: controller.{affinity}-tests.js
For models, the test file name is slightly different: {model_name}.{affinity}.js
If you remember, the Twitter mojit had the model twitter.server.js, so the test file for the model would be twitter.server-tests.js.
Writing Tests
As we mentioned in the introduction, unit tests in Mojito use the testing framework YUI Test. To use the testing framework, you require 'mojito-test' in your test files and the module name that is being tested. For example, in the code snippet below, the testing framework is included as well as the module that is being tested ('github').
{ requires: [ 'mojito-test', 'github' ] }
Test Components
Before we look at the unit tests for Mojito, let’s take a look at the core components of YUI tests, so you’ll have a better understanding of how the Mojito tests work.
Test Suites
Test suites are just a way of grouping test cases together for a module.
Example: var suite = new YUITest.TestSuite('mymojit-tests');
Test Cases
Test cases are methods designed to test a specific piece of functional code. The test methods are named as typical JavaScript methods or using a string describing what the method does, such as “test mojit” purpose. Test cases use the setUp method before each and every test in the test case to set up objects or variables needed by the test methods. The tearDown method is run after each test is run to free up memory after the test is run. The methods themselves often use assertions to verify the validity of a particular action or function.
Example:
var test_case1 = new YUITest.TestCase({
  name: 'myMojit user tests',
  setUp: function() {
    controller = Y.mojito.controllers["mymojit"];
  },
  tearDown: function() {
    controller = null;
  },
  'test mojit': function() {
     // Add test code/assertions here
  }
});
Test Runners
The test runner is a singleton object that simply runs all of the tests in test cases and suites, reporting back on passes and failures. Typically, you would call the run method in YUI tests, but Mojito calls run for you when running mojito test.
Example: YUITest.TestRunner.add(suite);
Assertions
Assertions are methods that check the validity of a particular action or function. If the action or function is not valid, the assertion method throws an error that causes the test to fail. When all assertions pass within a test method, the test is said to have passed. The YUI Test framework has assertion methods for testing equality, sameness, data types, special values, and forced failures. Please see the YUI Assertion documentation for details.
Example:
var A = YUITest.Assert;
A.isNotNull(controller);
Mock Objects
Mock objects are used to eliminate test dependencies on other objects. In Mojito, you often create a mock version of the ActionContext object to test methods such as done. The expect method allows you to set up expectations for the mock object that can later be verified with the verify method. The example below helps illustrate how the two methods work together.
Example:
var ac = new Y.mojito.MockActionContext();
ac.expect(
  {
    method: 'done',
    args: [YUITest.Mock.Value.Object],
    run: function(data) {
      YUITest.ObjectAssert.areEqual({ just: 'testing' });
    }
  }
);
ac.verify();
Controller Tests
Now that you have a basic understanding of YUI test, writing controller tests should be fairly easy. You’ll need to do one thing specific to Mojito and that is get the YUI module of the controller to test. You do this by requiring the YUI module name for the controller and then accessing the controller code with the following: Y.mojito.controller["{YUI_module_name}"]
Thus, if we were going to test the controller with the register YUI module name myMojit, we would have 'myMojit' in the required array and assign Y.mojito.controller["mymojit"] to a variable in the test as shown below:
YUI.add('mymojit-tests', function(Y) {
  var suite = new YUITest.TestSuite('mymojit-tests'),
      controller = null,
      A = YUITest.Assert;

  suite.add(new YUITest.TestCase({

    name: 'myMojit user tests',
    setUp: function() {
      // Fetch the module for the controller
      controller = Y.mojito.controllers["mymojit"];
    },
    ...
  YUITest.TestRunner.add(suite);
  // Include the module as a dependency for the test
}, '0.0.1', {requires: ['mojito-test', 'mymojit']});
Putting the Components Together
You create a test suite with the name passed to the test module:
YUI.add('github-tests', function(Y, NAME) {
  var suite = new YUITest.TestSuite(NAME);
You add a test case to the suite with a setUp method that accesses the controller object and a tearDown method to remove the object from memory:
...
  suite.add(new YUITest.TestCase({
    name: 'Foo tests',
    setUp: function() {
      controller = Y.mojito.controllers["foo"];
    },
    tearDown: function() {
      controller = null;
    },
...
Now comes the tests within the test case. We use a human-readable name for the test such as test mojit and then just test that the controller exists, that it has a function called index, and that data is returned as shown in the example below.
 ...
   ...
      'test mojit': function() {
        var ac, doneCalled = false;
        A.isNotNull(controller);
        A.isFunction(controller.index);
        ac = {
          done: function(data) {
          doneCalled = true;
          A.isObject(data);
        }
      };
      controller.index(ac);
      A.isTrue(doneCalled);
    }
  ...
...
Finally, you add the test suite to the runner:
YUITest.TestRunner.add(suite);
Don’t forget to add mojito-test and the module you are testing (YUI registered name for the controller) to the requires array:
}, '0.0.1', {requires: ['mojito-test', 'foo']});
You can also add properties to the ac object to mimic the ActionContext addons such as assets and models as show below. Here we’re also testing the asset file that is returned, the data returned from ac.done and ac.models.get:
...
  ...
    'test mojit': function () {
      var ac,
          modelData,
          assetsResults,
          doneResults;
      modelData = { x:'y' };
      ac = {
        assets: {
          addCss: function (css) {
            assetsResults = css;
          }
        },
        models: {
          get: function (modelName) {
            A.areEqual('github-model', modelName, 'wrong model name');
            return {
              getData: function (cb) {
                cb(null, modelData);
              }
            }
          }
        },
        done: function (data) {
          doneResults = data;
        }
      };
      A.isNotNull(controller);
      A.isfunction (controller.index);
      controller.index(ac);
      A.areSame('./index.css', assetsResults);
      A.isObject(doneResults);
      A.areSame('Mojito is working.', doneResults.status);
      A.isObject(doneResults.data);
      A.isTrue(doneResults.data.hasOwnProperty('x'));
      A.areEqual('y', doneResults.data['x']);
    }
  ...
...
Model Tests
The model tests have the same structure as controller tests with the exception of how you access the module. You use Y.mojito.models["{YUI module name}"] to access the model. Again, you also have to require mojito-test and the YUI registered module name for the model. The test suite, test cases, setUp/tearDown methods, and assertions all work in the same way.
In the example model test that we’ll be creating later, the model with the registered YUI module name youtube-model-yql is required and then accessed in the setUp method.
...
  var suite = new YUITest.TestSuite(NAME),
      model = null,
      A = YUITest.Assert;
  suite.add(new YUITest.TestCase({
    name: "youtube-model-yql user tests",
    setUp: function (){
      model = Y.mojito.models["youtube-model-yql"];
    },
    ...
  ...
}, '0.0.1', {requires: ['mojito-test', 'youtube-model-yql']});
YUI.add('youtube-model-yql-tests', function (Y, NAME) {

  var suite = new YUITest.TestSuite(NAME),
      model = null,
      A = YUITest.Assert;
  suite.add(new YUITest.TestCase({
    name: "youtube-model-yql user tests",
    setUp: function (){
      model = Y.mojito.models["youtube-model-yql"];
    },
    tearDown: function (){
      mode = null;
    },
    'test mojit model': function (){
      var called = false,
          cfg = { color: 'red' };
      A.isNotNull(model);
      A.isfunction (model.init);
      model.init(cfg);
      A.areSame(cfg, model.config);

      // Check getData function is there
      A.isfunction (model.getData);

    }
  }));
  YUITest.TestRunner.add(suite);
}, '0.0.1', {requires: ['mojito-test', 'youtube-model-yql']});
Running Unit Tests
To run functional tests, you use the Mojito command-line utility. The test command allows you to test all of the mojits of an application or specify a mojit. Mojito will test all of the unit tests in the tests directory. To test all the mojits in the application that we are going to create this module, you would use the following:
$ mojito test app .
To test our Github, you would specify the mojit:
$ mojito test mojit mojits/Github
Functional Tests
You could say that a functional test is any test that is not a unit test, but for simplicity and our intent, we’re calling functional tests those that test the UI or functionality of an application. So, if you want to test the DOM or DOM events, you’re going to write functional tests and use Arrow.
Intro to Arrow
Arrow is a testing framework that combines JavaScript, Node.js, and PhantomJS/Selenium. It attempts to make writing functional tests as easy as unit tests. In fact, you write the both unit and functional tests using YUI Test as well, but Mojito already has a convenient test command for running unit tests, so we’re going to focus on Arrow functional tests. As this is not an Arrow guide, we’re only going to scratch the surface of using the Arrow testing framework. We’ll look at writing tests, running a test suite, and using the Arrow command. To learn more about Arrow, we highly recommend that you read the Arrow documentation.
Writing Arrow Tests
As we’ve already said, tests for Arrow are written using YUI Test. You pass in a configuration object to YUI, load the modules that your test needs with the use method, and then write the test in the same way as you wrote unit tests: create a test suite, add a test case, and add the test case to the runner. Like Mojito, Arrow will call the method run for you to run the tests.
The main difference between the Mojito unit tests and Arrow tests is that Mojito unit tests register the module name (with the method add), and Arrow tests just load modules. The added difference here is that we’re using Arrow for functional tests, so the tests themselves are using the DOM.
In the example functional test for the getting started example in Mojito, the test "test hello" shown below uses an assertion to confirm that the text value of the <pre> element is "Hello World!". You can also pass a configuration object passed to YUI to add configurations and load more modules for other tests.
...
  YUI({
    useConsoleOutput: true,
    useBrowserConsole: true,
    logInclude: { TestRunner: true }
  }).use('node', 'node-event-simulate', 'test', 'console', function (Y) {

  var suite = new Y.Test.Suite("DeveloperGuide: hello");
  suite.add(new Y.Test.Case({
    "test hello": function() {
      Y.Assert.areEqual("Hello World!", Y.one('pre').get('innerHTML'));
    }
  }));
  Y.Test.Runner.add(suite);
});
Test Descriptors
Intro
Test Descriptors are JSON configuration files that allow you to organize your tests into test suites. You can also use test descriptors to control when and which tests execute at a given phase of your development cycle.
Configurations
Test descriptors have configurations for describing, organizing, and factoring the tests. You can configure the base URL, group tests, pass parameters, and specify the page to test as well as the JavaScript test to run.
The example test descriptor written to run the hello test we looked at earlier shows most of the important configurations. The name property allows you to describe your test, the config object allows you to specify the base URL, application name, and path. The dataprovider object is where your tests are contained. Each test, such as "hello" below, can be grouped and be passed parameters. The params object below specifies the test and the page. Notice the annotations $$ are used to indicate variables.
[
  {
    "settings": [ "master" ],
    "name" : "hello",
    "config" :{
      "baseUrl" : "http://localhost:8666",
      "application" : {
        "name":"hello",
        "path": "../../../examples/developer-guide/hello"
      }
    },
    "dataprovider" : {
      "hello" : {
        "group" : "developerguide,hello",
        "params" : {
          "test" : "test_hello.js",
          "page" : "$$config.baseUrl$$/"
        }
      }
    }
  }
]
Many of the configurations in the test descriptor files can be passed (and overridden) from the command line. For example, the baseUrl property in the config object can be specified on the command line:
$ arrow <some test or test descriptor> --baseUrl=http://some.base.url.com
When to Create Test Descriptors
Before creating test descriptors, we recommend executing each test with the Arrow command. Once you have a set of working tests, you should organize and factor the tests with a test descriptor. During test development, you’ll probably execute each test from the Arrow command line. However, once you have created tests to validate your module, you need a way to organize and factorize the tests. The test descriptor will also help you run batch tests to reduce the number of test commands.
Tests Based on Contexts
You can also configure tests based on contexts, so you could run a set of tests for the development environment and run a different set of tests for the production environment. The contexts in the text descriptors are like those in the configuration files for Mojito applications. In the example test descriptor below, you can see that given the context "environment:development", the tests uses a different baseURL:
[
  {
    "settings": [ "master" ],
    "name" : "hello",
    "config" :{
      "baseUrl" : "http://localhost:8666",
      "application" : {
        "name":"hello",
        "path": "../../../examples/developer-guide/hello"
      }
    },
    "dataprovider" : {
      "hello" : {
        "group" : "developerguide,hello",
        "params" : {
          "test" : "test_hello.js",
          "page" : "$$config.baseUrl$$/"
        }
      }
    }
  },
  {
    "settings": [ "environment:development" ],
    "config" :{
      "baseUrl" : "http://my-test-env.com:800",
      "application" : {
        "name":"hello",
        "path": "../../../examples/developer-guide/hello"
      }
    }
  }
]
Running Arrow Command
The Mojito source code comes with built-in unit and functional tests that we’re going to look at to illustrate how to use the Arrow command. The example tests and test descriptors are a great reference as well. Mojito also comes with the script run.js to simplify running the built-in Mojito tests. You can follow the instructions in Mojito Framework’s Unit and Functional Tests to run all of the tests or just a group of tests, which is highly recommended if you are going to contribute code to the Mojito project.
Setting Up
Clone Mojito:
$ git clone https://github.com/yahoo/mojito.git
Install the application dependencies.
$ npm install
Start PhantomJS.
$ node_modules/phantomjs/bin/phantomjs --webdriver=4445 &
Change to the examples/developer-guide/hello directory and start the application.
In a new terminal window or tab, change to mojito/tests/func/examples/developerguide.
Single Tests
In the developerguide directory, we’re going to first run the test directly with the Arrow command: $ arrow --browser=phantomjs test_hello.js --page=http://localhost:8666
You should see the following output:
Passed DeveloperGuide: hello onMozilla/5.0 (Macintosh; Intel Mac OS X 10_7_5)
AppleWebKit/537.31 (KHTML, like Gecko) Chrome/26.0.1410.43 Safari/537.31
1 Passed, 0 Failed , 0 skipped
Using Test Descriptors
We’re going to run the same test, but use the test descriptor to run it. Once again, from the developerguide directory and with the hello application and Selenium still running, run the following command:
$ arrow --browser=phantomjs hello_descriptor.json
Creating the Application
After you have copied the application that you made in the last module (see Setting Up), change into the application 06_testing.
Let’s create mojits to fill out the dashboard.
$ mojito create mojit Calendar
$ mojito create mojit Youtube
Create mojit instances of our new mojits and make them children of the body instance as shown in the snippet of the application.json below and update the path to the CSS assets while you’re editing the file.
"body": {
  "type": "Body",
  "config": {
    "children": {
      "github": {
        "type":"Github"
      },
      "calendar": {
        "type":"Calendar"
      },
      "twitter": {
        "type":"Twitter"
      },
      "youtube": {
        "type": "Youtube"
      }
    }
  }
}
Let’s update our new mojits, starting with the Youtube mojit. Rename the mojits/Youtube/models/model.server.js to mojits/Youtube/models/youtube.server.js
We’re going to use YQL to get data for our new mojits. with the following. If you are having difficulty understanding the YQL statement, review the Getting Data module.
YUI.add('youtube-model-yql', function(Y, NAME) {

  Y.namespace('mojito.models')[NAME] = {

    init: function(config) {
      this.config = config;
    },
    /**
    * Method that will be invoked by the mojit controller to obtain data.
    *
    * @param callback {function(err,data)} The callback function to call when the
    *        data has been retrieved.
    */
    getData: function (params, callback) {
      Y.log("youtube server getData called");
      var
          feedURL = "https://gdata.youtube.com/feeds/base/users/yuilibrary/uploads",
          query = "select id,title,link,published from feed(0,6) where url='{feed}' and link.rel='alternate'",
          queryParams = {
              feed: feedURL
          },
          cookedQuery = Y.Lang.sub(query, queryParams);

      Y.YQL(cookedQuery, Y.bind(this.onDataReturn, this, callback));

    },
    onDataReturn: function (cb, result) {
      Y.log("youtube.server onDataReturn called");
      if (result.error === undefined) {
        var results = {};
        if (result && result.query && result.query.results && result.query.results.entry) {
          results = result.query.results.entry;
        } else {
          results = null;
        }
        cb(results);
      } else {
        cb(result.error);
      }
    }
  };
}, '0.0.1', {requires: []});
The controller will need to get the correct module and call the getData method correctly. We’re also going to include the function youtubeMap to help format the returned response from the YouTube API. For the sake of simplicity, go ahead and replace the content of the index method of mojits/Youtube/controller.server.js with the following:
index: function (ac) {
  ac.models.get('youtube').getData({}, function (data) {
    var res = [];
        res = youtubeMap(ac, data);
    // populate youtube template
    ac.done({
      title: "YUI YouTube Videos",
      results: res
    });
  });
}
The getData method relies on the utility function youtubeMap that formats the returned response for your application. Add the youtubeMap shown below to the controller, but be sure to place it above (or below) the block scope of Y.namespace('mojito.controllers')[NAME] = {:
var youtubeMap = function (ac, data) {
  Y.log("youtubeMap called");

  var res = [];
  Y.Array.each(data, function (itm, idx, arr) {
    Y.log(itm);
    var
         title = itm.title,
          id = itm.id.split("http://gdata.youtube.com/feeds/base/videos/")[1];
    Y.log("youtubevid id:" + id);
    res[idx] = {
      title: title,
      id: id
    };
  });
  return res;
};
To display the YouTube results, you’ll need to replace the boilerplate code in index.hb.html with the following:
<div id="" class="mojit">
  <div class="mod" id="youtube">
    <h3>
      <strong></strong>
      <a title="minimize module" class="min" href="#">-</a>
      <a title="close module" class="close" href="#">x</a>
    </h3>
    <div class="inner">
      <ul>
      </ul>
    </div>
  </div>
</div>
Let’s update the code for the Calendar mojit as well. Rename mojits/Calendar/models/model.server.js to mojits/Calendar/models/calendar.server.js, update the content, and then do the same for the index method of the controller and the template index.hb.html with the code below:
YUI.add('calendar-model-yql', function (Y, NAME) {
  Y.mojito.models[NAME] = {
    init: function (config) {
      this.config = config;
    },
    getData: function (params, callback) {
      Y.log("getData called");
      var
          feedURL = "https://www.google.com/calendar/feeds/fcde7kbrqnu7iccq9ofi9lqqf8%40group.calendar.google.com/public/basic",
          query = "select entry.title, entry.summary, entry.link from xml where url='{feed}' and entry.link.rel='alternate' limit 10",
          queryParams = {
            feed: feedURL
          },
          cookedQuery = Y.Lang.sub(query, queryParams);

      if (Y.calendarData) {
        callback(Y.calendarData);
      } else {
        Y.namespace("calendarData");
        Y.YQL(cookedQuery, Y.bind(this.onDataReturn, this, callback));
      }
    },
    onDataReturn: function (cb, result) {
      Y.log("calendar.server onDataReturn called");
      if (result.error === undefined) {

        var results = result.query.results.feed;
        Y.Array.each(results, function (val, key, obj) {
          var tempDate = val.entry.summary.content;
          // strip off 'br', 'When:'' and 'to' elements to get date
          tempDate = tempDate.split("<")[0].split("When:")[1].split("to ")[0];
          val.entry.summary.content = tempDate;
        });
        Y.calendarData = results;
        cb(results);
      } else {
        cb(result.error);
      }
    }
  };
}, '0.0.1', {requires: ['yql', 'substitute']});
index: function (ac) {
  ac.models.get('calendar').getData({}, function (data) {

    // add mojit specific css
    ac.assets.addCss('./index.css');

    // populate blog template
    ac.done({
      title: "YUI Calendar Info",
      results: data
    });
  });
}
<div id="" class="mojit">
  <div class="mod" id="calendar">
    <h3>
      <strong></strong>
      <a title="minimize module" class="min" href="#">-</a>
      <a title="close module" class="close" href="#">x</a>
    </h3>
    <div class="inner">
      <ul>
      </ul>
    </div>
  </div>
</div>
We’re also going to have to update the template for our composite mojit Body, so that the content from our new mojits is attached to the page. Update the template mojits/Body/views/index.hb.html so that it’s the same as the code below:
<div id="" class="mojit">
  <h4 class="bodytext"></h4>
  <div class="bodyStuff yui3-g-r">
    <div class="yui3-u-1-3">

    </div>
    <div class="yui3-u-1-3">

    </div>
    <div class="yui3-u-1-3">


    </div>
  </div>
</div>
You might have noticed that the template we just updated has the Handlebars expression . The controller of the Body mojit needs to pass that data to the template, so update the ac.composite.done method in the controller so that it has the title property:
ac.composite.done({
  title: ""
})
That pretty much does it for our application code, but we still need to write a unit test for a controller and a model. We’re going to use our first mojit, Github as our example. Replace the content of Github/tests/controller.server-tests.js with the code below. Note the use of YUI Test, accessing the controller and model, creating objects for the ActionContext addons, and the use of assertions.
  YUI.add('github-tests', function (Y) {

    var suite = new YUITest.TestSuite('github-tests'),
        controller = null,
        model = null
        A = YUITest.Assert;

       suite.add(new YUITest.TestCase({

    name: 'Github user tests',
    setUp: function () {
        controller = Y.mojito.controllers["github"];
        model = Y.mojito.models["stats-model-yql"];
    },
    tearDown: function () {
        controller = null;
    },
    'test mojit': function () {
        var ac,
            assetsResults,
            route_param,
            doneResults,
            def_value;
        ac = {
            assets: {
                addCss: function (css) {
                    assetsResults = css;
                }
            },
            config: {
                getDefinition: function (key) {
                    def_value = key;
                }
            },
            params: {
                getFromRoute: function (param) {
                    route_param = param;
                }
            },
            models: {
                get: function (modelName) {
                    A.areEqual('StatsModelYQL', modelName, 'wrong model name');
                    return {
                        getData: function(params, cb) {
                            cb(params);
                        }
                    }
                }
            },
            done: function (data) {
                doneResults = data;
            }
        };
        A.isNotNull(controller);
        A.isFunction(controller.index);
        controller.index(ac);
        A.areSame('./index.css', assetsResults);
        A.isObject(doneResults);
        A.isTrue(doneResults.hasOwnProperty('watchers'));
    }
  }));
  YUITest.TestRunner.add(suite);
}, '0.0.1', {requires: ['mojito-test', 'github', 'stats-model-yql']});
Rename the model test to Github/tests/models/yql.server-tests.js and replace the content with the code below. The test just confirms that the configuration can be initialized and that the method getData is functional and returns and object.
YUI.add('stats-model-yql-tests', function(Y, NAME) {

  var suite = new YUITest.TestSuite(NAME),
      model = null,
      A = YUITest.Assert;
  suite.add(new YUITest.TestCase({

    name: 'stats-model-yql user tests',
    setUp: function() {
      model = Y.mojito.models["stats-model-yql"];
    },
    tearDown: function() {
      model = null;
    },
    'test mojit model': function() {
      var cfg = { color: 'red' };
      A.isNotNull(model);
      A.isFunction(model.init);
      model.init(cfg);
      A.areSame(cfg, model.config);
      A.isFunction(model.getData);
      model.getData({}, function(data) {
        A.isObject(data);
        return data;
      });
    }
  }));
  YUITest.TestRunner.add(suite);
}, '0.0.1', {requires: ['mojito-test', 'stats-model-yql']});
From the application directory, run the Github mojit tests.
$ mojito test mojit mojits/Github
You should see that one test has passed and the output should look like the following:
✔  passed  github-tests :: Github user tests :: test mojit
✔  passed  stats-model-yql-tests :: stats-model-yql user tests :: test mojit model

Total tests: 2     ✔ Passed: 2     ⚑ Deferred: 0   ✖ Failed: 0     100% pass rate
Now for our functional tests with Arrow. Create the directory arrow_tests to store our test files. Don’t name your directory tests because Mojito will try to run the tests as YUI unit tests.
In the arrow_tests directory, create the file test_yui_dashboard.js file with the content below. We’re just testing that the page loads for now.
YUI({
  useConsoleOutput: true,
  useBrowserConsole: true,
  logInclude: { TestRunner: true }
}).use('node', 'node-event-simulate', 'test', 'console', function (Y) {

  'use strict';
  var suite = new Y.Test.Suite("Dashboard App: Testing Module"),
      url = window.location.protocol + "//" + window.location.host + "/";
  suite.add(new Y.Test.Case({
    "test HTML title and heading of page": function () {
      var that = this;
      that.wait(function(){
          // Tests the title in HTML header
          Y.Assert.areEqual("Trib - YUI/Mojito Developer Dashboard", Y.one('head title').get('innerHTML'));

          // Tests the title within the content
          Y.Assert.areEqual("Trib - YUI Developer Dashboard", Y.one('body h1').get('innerHTML'));
      }, 2000);
    }
  }));
  Y.Test.Runner.add(suite);
});
You could run the test above directly, but we’re going to create the test descriptor file test_tribapp_descriptor.json with the code below that will allow us to easily add another test later. Remember, the dataprovider property defines the test and the page to be tested in a scenario array.
[
  {
    "settings": [ "master" ],
    "name" : "trib_app",
    "config" :{
      "baseUrl" : "http://localhost:8666",
      "application" : {
        "name":"input",
        "path": "../"
      }
    },
    "dataprovider" : {
      "test trib app index page" : {
        "group" : "tribapp",
        "params" : {
          "scenario": [
            {
              "test" : "test_yui_dashboard.js",
              "page" : "$$config.baseUrl$$"
            }
          ]
        }
      }
    }
  },
  {
    "settings": [ "environment:development" ]
  }
]
It’s time to run our functional tests, but before we do, make sure that you have completed Setting Up, so that you have Arrow and PhantomJS installed.
Start PhantomJS in the background: $ node_modules/phantomjs/bin/phantomjs --webdriver=4445 &
Start your application in the background as well: $ node app.js &
Run your Arrow test with the descriptor: $ arrow --browser=phantomjs arrow_tests/test_tribapp_descriptor.json
You’ll see INFO log messages describing the running of the tests, then debug statements, and finally the test result, which should be one passed test as shown below:
Passed TribApp: YUI Dashboard test onMozilla/5.0 (Macintosh; Intel Mac OS X) AppleWebKit/534.34 (KHTML, like Gecko)
PhantomJS/1.9.0 Safari/534.34 1 Passed, 0 Failed , 0 skipped
You can go ahead and run your application to see the new content from the Youtube and Calendar mojits.
Summary
We covered the following topics in this chapter.
- unit tests
- model tests
- controller tests
- functional tests with Arrow
- mock ActionContext objects
- assertions
Troubleshooting
TypeError: Cannot read property ‘index’ of undefined
If you run unit tests and see that the index property is undefined for a given mojit test, it most likely means that you were unable to access the controller. You should inspect that the unit test for the mojit in question has included the module name in the requires array or that you have a typo in the expression Y.mojito.controllers.{mojit_module_name}.
test YUI Dashboard:Unexpected error: ‘null’ is not an object
If you get a null error when you run the functional tests with Arrow, it could mean that the application or PhantomJS is not running. Make sure you start both and then run the tests.
Q&A
Can models have mocked objects as well?
Yes, you can can mock an ActionContext object for model tests as well. See Mocking Models.
Can I use Arrow to run the unit tests as well?
Yes, both Mojito and Arrow use YUI Test, so running the unit tests with Arrow is fairly simple. For example, to run the controller tests for the Header mojit, you would run the following command:
$ arrow mojits/Header/tests/controller.server-tests.js --lib=mojits/Header/controller.server.js
Naturally, use the test command that comes with the Mojito CLI utility is simpler, but you can Arrow, which also has more options.
Test Yourself
Questions
- Where do you place application and mojit test files?
- What is the difference between a unit and a functional test?
- What is the command for running the unit tests for the mojit Header?
- How do you mock the ActionContext object?
- Name three of the components used in YUI tests.
Additional Exercises
- Write unit tests for the Header, Footer, and Youtube mojits.
- Write another test case in the functional test that we created and then run the functional test again.
- Try mocking the ActionContext object in one of your controller tests.
Terms
- Arrow
- A test framework that integrates JavaScript, NodeJS and Selenium to promote test-driven JavaScript development.
- YUI test suite
- A grouping of multiple test cases that can be run together.
- YUI test runner
- A singleton object used to run test cases and suites.
- YUI test case
- The basis of YUI tests that allows you to initialize dependencies, execute tests, and clean up.
- mock object
- An object created to eliminate test dependencies in test cases. In Mojito, it is common to mock the ActionContext object.