Including YUI Modules in Views
Time Estimate: 15 minutes
Difficulty Level: Intermediate
Summary
This example shows how to include the YUI ScrollView Module in your view.
The following topics will be covered:
- embedding the YUI ScrollView Module in the template
- implementing a scrolling content widget
Implementation Notes
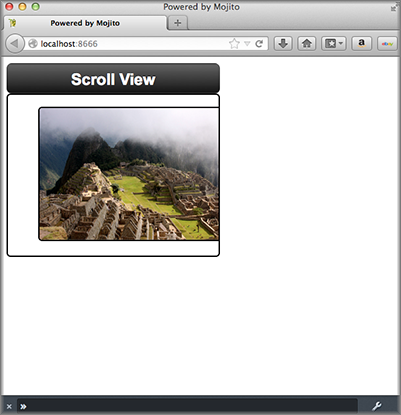
The following screenshots show you how the application appears on different devices.
In the application.json file for this code example, the customized CSS is specified in the assets array as seen below.
[
  {
    "settings": [ "master" ],
    "specs": {
      "frame" : {
        "type" : "HTMLFrameMojit",
        "config": {
          "deploy": true,
          "child" : {
            "type" : "scroll"
          },
          "assets": {
            "top": {
              "css":[
                "/static/scroll/assets/index.css"
              ]
            }
          }
        }
      }
    }
  },
  {
    "settings": [ "device:iphone" ],
    "selector": "iphone"
  }
]
The mojit controller provides the photo URLs for the scrollable content widget. In the controller.server.js below, the photos array that contains the photo URLs and the text for the image alt attribute is passed to the index template.
YUI.add('scroll', function (Y, NAME) {
  Y.namespace('mojito.controllers')[NAME] = {
    index: function (ac) {
      // Populate Template
      ac.done({
        title: 'Scroll View',
        photos: [
          {
            url: 'http://farm5.static.flickr.com/4136/4802088086_c621e0b501.jpg',
            alt: 'Above The City II'
          },
          {
            url: 'http://farm5.static.flickr.com/4114/4801461321_1373a0ef89.jpg',
            alt: 'Walls and Canyon'
          },
          {
            url: 'http://farm5.static.flickr.com/4100/4801614015_4303e8eaea.jpg',
            alt: 'Stairs Using In Situ Stone'
          },
          {
            url: 'http://farm5.static.flickr.com/4076/4801368583_854e8c0ef3.jpg',
            alt: 'Tree Silhouette'
          }
        ]
      });
    }
  };
}, '0.0.1', {requires: []});
In the binder index.js below, the YUI ScrollView module is required by adding the string scrollview to the required array. To create the scrolling content widget, you need to instantiate a ScrollView object by passing an object containing parameters for the container (srcNode), an ID, dimensions, and scroll behavior (flick) and then use the method render to attach the scroll view to the HTML DOM.
YUI.add('scroll-binder-index', function (Y, NAME) {

  Y.namespace('mojito.binders')[NAME] = {
    init: function (mojitProxy) {
      this.mojitProxy = mojitProxy;
    },
    bind: function (node) {
      var scrollView = new Y.ScrollView({
          id: 'scrollview',
          srcNode: node.one('#scrollview-content'),
          width: 320,
          flick: {
            minDistance:10,
            minVelocity:0.3,
            axis: "x"
          }
        });
        scrollView.render();

        // Prevent default image drag behavior
        scrollView.get("contentBox").delegate("mousedown", function(e) {
          e.preventDefault();
        }, "img");
      }
    };
  }, '0.0.1', {requires: ['scrollview']});
The container (value for srcNode) for the scroll view must be an existing HTML node, so the template index.hb.html must have a div element with the id attribute of scrollview-content as shown below.
<div id="" class="mojit">
  <div id="scrollview-container">
    <div id="scrollview-header">
      <h1></h1>
    </div>
    <div id="scrollview-content" class="yui3-scrollview-loading">
      <ul>
      </ul>
    </div>
  </div>
</div>
For detailed instructions about YUI ScrollView, see ScrollView: Getting Started.
Setting Up this Example
To set up and run scroll_views:
Create your application.
$ mojito create app scroll_views
Change to the application directory.
Create your mojit.
$ mojito create mojit scroll
To configure you application, replace the code in application.json with the following:
[
  {
    "settings": [ "master" ],
    "specs": {
      "frame" : {
        "type" : "HTMLFrameMojit",
        "config": {
          "deploy": true,
          "child" : {
            "type" : "scroll"
          },
          "assets": {
            "top": {
              "css":[
                "/static/scroll/assets/index.css"
              ]
            }
          }
        }
      }
    }
  },
  {
    "settings": [ "device:iphone" ],
    "selector": "iphone"
  }
]
Update your app.js with the following to use Mojito’s middleware, configure routing and the port, and have your application listen for requests:
'use strict';

var debug = require('debug')('app'),
    express = require('express'),
    libmojito = require('mojito'),
    app;

    app = express();
    app.set('port', process.env.PORT || 8666);
    libmojito.extend(app);

    app.use(libmojito.middleware());

    app.get('/status', function (req, res) {
        res.send('200 OK');
    });
    app.get('/', libmojito.dispatch('frame.index'));

    app.listen(app.get('port'), function () {
        debug('Server listening on port ' + app.get('port') + ' ' +
        'in ' + app.get('env') + ' mode');
    });
    module.exports = app;
Confirm that your package.json has the correct dependencies as show below. If not, update package.json.
"dependencies": {
    "debug": "*",
     "mojito": "~0.9.0"
},
"devDependencies": {
    "mojito-cli": ">= 0.2.0"
},
From the application directory, install the application dependencies:
$ npm install
Change to mojits/scroll.
To have the controller send image data to the template for the scrolling widget, replace the code in controller.server.js with the following:
YUI.add('scroll', function (Y, NAME) {

  Y.namespace('mojito.controllers')[NAME] = {
    index: function (ac) {
      // Populate Template
      ac.done({
        title: 'Scroll View',
        photos: [
          {
            url: 'http://farm5.static.flickr.com/4136/4802088086_c621e0b501.jpg',
            alt: 'Above The City II'
          },
          {
            url: 'http://farm5.static.flickr.com/4114/4801461321_1373a0ef89.jpg',
            alt: 'Walls and Canyon'
          },
          {
            url: 'http://farm5.static.flickr.com/4100/4801614015_4303e8eaea.jpg',
            alt: 'Stairs Using In Situ Stone'
          },
          {
            url: 'http://farm5.static.flickr.com/4076/4801368583_854e8c0ef3.jpg',
            alt: 'Tree Silhouette'
          }
        ]
      });
    }
  };
}, '0.0.1', {requires: []});
- To instantiate a ScrollView and have it rendered in the DOM, replace the
code in binders/index.js with the following:
YUI.add('scroll-binder-index', function (Y, NAME) {

  Y.namespace('mojito.binders')[NAME] = {
    init: function (mojitProxy) {
      this.mojitProxy = mojitProxy;
    },
    bind: function (node) {
      var scrollView = new Y.ScrollView({
          id: 'scrollview',
          srcNode: node.one('#scrollview-content'),
          width: 320,
          flick: {
              minDistance:10,
              minVelocity:0.3,
              axis: "x"
          }
      });
      scrollView.render();

      // Prevent default image drag behavior
      scrollView.get("contentBox").delegate("mousedown", function(e) {
          e.preventDefault();
      }, "img");
    }
  };
}, '0.0.1', {requires: ['scrollview']});
To modify the index template, replace the code in views/index.hb.html with the following:
<style>
  /* Avoid resource latency for these, since they hide unenhanced content */
  .yui3-js-enabled .yui3-scrollview-loading {
    visibility:hidden;
  }
  #additional-content {
    display:none;
  }
</style>
<div id="" class="mojit">
  <div id="scrollview-container">
    <div id="scrollview-header">
      <h1></h1>
    </div>
    <div id="scrollview-content" class="yui3-scrollview-loading">
      <ul>
      </ul>
    </div>
  </div>
</div>
To add CSS for the index template, replace the contents of assets/index.css with the following:
html, body {
  margin:0;
  padding:0;
  font-family: arial,helvetica,clean,sans-serif;
}
#scrollview {
  border:2px solid #000;
  -webkit-border-radius:6px;
  -moz-border-radius:6px;
  border-radius:6px;
}
#scrollview-content img {
  border:2px solid;
  -webkit-border-radius:6px;
  -moz-border-radius:6px;
  border-radius:6px;
  width: 300px;
  margin: 2px -1px 2px 6px;
  -webkit-transform: translate3d(0, 0, 0);
}
/* To layout horizontal LIs */
#scrollview-content {
  white-space:nowrap;
}
#scrollview-content li {
  display:inline-block;
  background-color:#fff;
}
/* For IE 6/7 - needs inline block hack */
#scrollview-content li {
  *display:inline;
  *zoom:1;
}
/* === scrollview container and header styles === */
#scrollview-container {
  float:left;
  margin:10px;
}
#scrollview-header {
  height:44px;
  *width:320px;
  border: 1px solid #9c9c9c;
  /* Fallback style */
  border: 1px solid rgba(0, 0, 0, 0.3);
  -webkit-border-radius: .5em;
  -webkit-border-top-left-radius: .5em;
  -webkit-border-top-right-radius: .5em;
  -webkit-border-bottom-left-radius: .5em;
  -webkit-border-bottom-right-radius: .5em;
  -moz-border-radius: .5em;
  border-radius: .5em;
  background: #141414;
  background: -webkit-gradient(linear, left top, left bottom, from(#656565), to(#141414) );
  background: -moz-linear-gradient(-90deg, #656565, #141414);
  filter: progid:DXImageTransform.Microsoft.Gradient(GradientType=0, StartColorStr='#656565', EndColorStr='#141414');
}
#scrollview-header h1 {
  color: #fff;
  margin:0;
  padding:10px 0;
  text-align:center;
  font-size:150%;
  font-weight:bold;
  text-shadow: 0 -1px 0 rgba(0,0,0,0.7);    }
#scrollview-pager {
  padding:5px;
}
From the application directory, run the server.
$ node app.js
To view your application, go to the URL: